How to Set Up a Solar Trail Camera for 24/7 Security
Key Takeaways
Solar trail cameras are a cost-effective, low-maintenance solution for home security. With the right setup, you can capture clear footage, receive instant alerts, and protect your property without worrying about batteries or complicated wiring. This guide walks you through how to set up a solar trail camera for security, from choosing the perfect spot to troubleshooting common issues and maximizing your camera’s potential.
Why Use a Solar Trail Camera for Security?
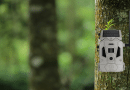
Picture this: you’re away for the weekend, but your home is still protected. Solar trail cameras harness the sun’s energy to provide continuous daily and night surveillance in any weather. They’re ideal for busy homeowners who want reliable, hands-off security. Unlike traditional security cameras, solar trail cameras don’t require professional installation, electrical wiring, or frequent battery changes.
Benefits of solar trail cameras for security:
- Easy DIY installation: No need for drilling holes or hiring an electrician.
- Weatherproof and rugged: Built to withstand rain, snow, and extreme temperatures.
- No ongoing power costs: Solar panels keep your camera charged year-round.
- Real-time notifications: Get instant alerts and live video feeds on your phone.
- Flexible placement: Perfect for driveways, gates, backyards, sheds, barns, and remote areas.
Solar trail cameras are also great for monitoring vacation homes, rental properties, or any location where running power is challenging.
Step-by-Step Solar Trail Camera Setup Guide
1. Choose the Best Location

The first step in setting up a solar trail camera is picking the right spot. Think about the most vulnerable areas on your property. Is it the front door, driveway, or a hidden side gate? The right placement ensures you capture the action that matters most.
Best placement for trail cameras:
- Driveways and garages: Mount 7–8 feet high, facing the entrance for a clear view of vehicles and visitors.
- Backyards and fences: Place cameras every 30–40 feet for wide coverage.
- Sheds and barns: Angle toward doors at about chest height to catch anyone approaching.
- Entry gates: Position the camera to cover the path leading to your home.
Solar charging tips:
- Face the solar panel south for maximum sunlight.
- Avoid placing cameras where trees or buildings cast shadows.
- Tilt the panel at a 30–45° angle for optimal charging.
- Regularly check for overgrown branches or debris that could block sunlight.
If you’re unsure about the best spot, test the camera in a few locations for a few days to see which gives you the clearest, most reliable footage.
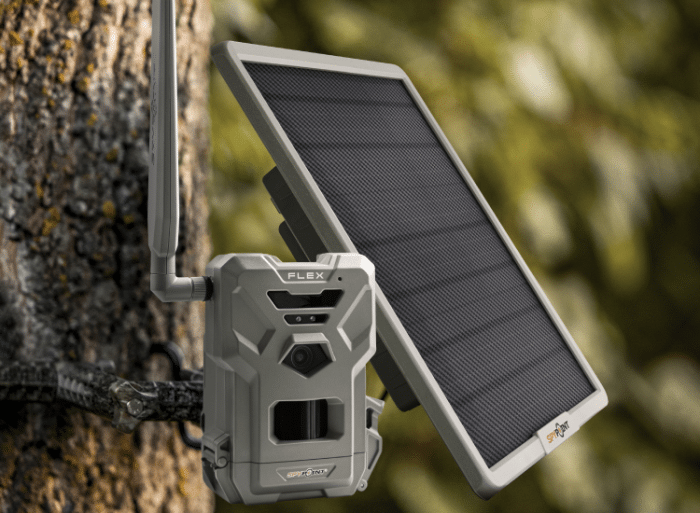
2. Mount Your Camera
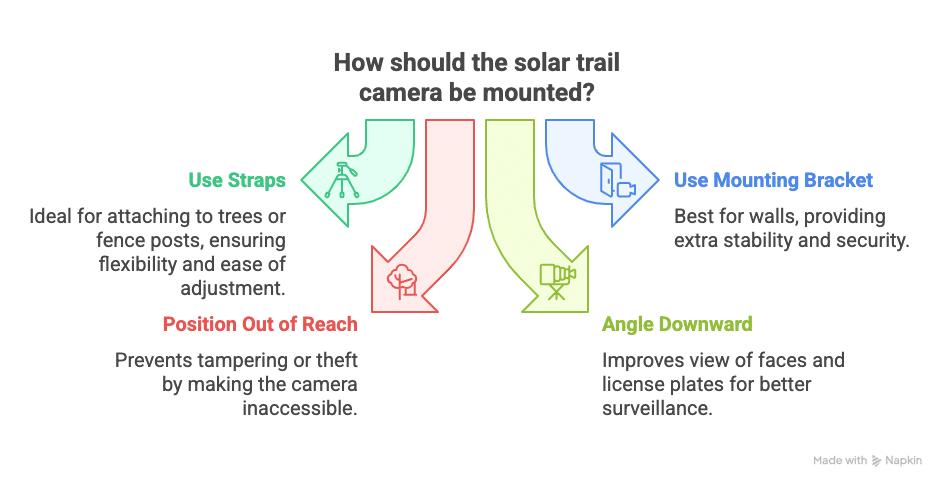
Mounting your solar trail camera is quick and straightforward. Most models come with adjustable straps or brackets. Whether you’re attaching it to a tree, fence post, or wall, make sure it’s secure and positioned for the best view.
How to install a solar trail camera:
- Use straps to attach to trees or fence posts.
- For walls, use a mounting bracket for extra stability.
- Keep cameras out of easy reach to prevent tampering or theft.
- Angle the camera slightly downward for a better view of faces and license plates.
Pro tip: Test the camera’s angle and field of view before tightening everything down. Sometimes, a slight adjustment can make a big difference in what the camera captures.
3. Adjust Camera Settings
Fine-tuning your camera’s settings ensures you get the necessary alerts and footage, without being overwhelmed by false alarms.
Recommended solar trail camera settings for security:
- Motion sensitivity: Set to medium to avoid false alarms from pets or wind.
- Video length: 15–30-second clips usually capture the whole event.
- Night vision: Enable for 24/7 protection.
- Time-lapse mode: This is used to monitor large areas or construction sites.
Security features:
- Set a password for camera access to prevent unauthorized changes.
- Use activity zones to focus on key areas like doors, driveways, and windows.
- Enable push notifications for instant alerts.
Connect to Your Phone or Cloud

Imagine getting a real-time alert while you’re at work or on vacation. Wi-Fi or cellular connectivity lets you see what’s happening on your property from anywhere.
How to connect a solar trail camera for security:
- Download the camera’s app on your smartphone or tablet.
- Scan the QR code on your camera to connect it to your account.
- Enable motion alerts and select cloud storage if available for extra backup.
- Set up multiple users so family members can also receive alerts.
For cellular models, choose a data plan that fits your needs. Many affordable plans charge only for the data you use.
Troubleshooting Common Issues
Even the best systems need a little TLC. Here’s how to fix common problems fast:
| Problem | Simple Fix |
|---|---|
| False alerts | Trim nearby bushes, lower sensitivity |
| Not charging | Clean the solar panel, check for shade |
| Blurry night video | Wipe the lens, check camera settings |
| Missed events | Adjust motion sensitivity, test camera angle |
Battery tip: Use lithium batteries as a backup for cloudy days or extended periods without sunlight.
Pro Tips for Better Security
Blending your camera into the environment is a smart move. Try painting the housing to match tree bark, hiding it in a decorative birdhouse, or using camouflage tape. Don’t be afraid to use multiple cameras—placing them at different entry points gives you complete coverage and peace of mind.
- Blend in: Paint the camera or use a birdhouse cover to match its surroundings.
- Use multiple cameras: Place at all main entry points for full coverage.
- Seasonal checks: Adjust the panel angle in fall and clear snow in winter for consistent charging.
- Routine maintenance: Wipe the lens and solar panel every few weeks for best performance.
Solar Trail Camera vs. Traditional Security Camera
Traditional wired cameras can be expensive and a hassle to install. Solar trail cameras are a game-changer for homeowners who want reliable security without the extra costs.
| Feature | Solar Trail Camera | Wired Camera |
|---|---|---|
| Installation | DIY, no wiring | Professional |
| Monthly costs | Low to none | Higher |
| Power outages | Keeps working | May fail |
| Flexibility | Move anywhere | Fixed |
With solar trail cameras, you save money, avoid hassle, and get security that works no matter what.
FAQ: Solar Trail Camera Setup for Security
Q: Can I use a solar trail camera indoors for security?
A: Solar trail cameras work best outdoors where they can receive sunlight, but they can also be used indoors near a window if needed.
Q: How long does a solar trail camera battery last?
A: With good sunlight, most solar trail cameras can run indefinitely. On cloudy days, backup batteries can last several weeks.
Q: Will a solar trail camera work in winter?
A: Your camera will continue to work as long as the solar panel gets some sunlight and you keep snow off it.
Q: How do I stop false alerts from animals or wind?
A: Adjust the motion sensitivity, trim bushes, and set activity zones to focus on critical areas.
Q: Do I need Wi-Fi for a solar trail camera?
A: Not always. Many models use cellular networks so that you can get alerts even without home Wi-Fi.
Q: What’s the best placement for trail cameras for home security?
A: Place cameras at main entry points, driveways, and other vulnerable spots. Mount them high enough to avoid tampering but low enough for a clear view.
Q: Can I move my solar trail camera if I change my mind?
A: Absolutely! One of the most significant advantages of solar trail cameras is their flexibility. You can easily move them to a new location if your security needs change.
Final Thoughts
Setting up a solar trail camera for home security isn’t just smart—it’s surprisingly simple. Start with one camera at your most vulnerable spot, like a garage or back door, and expand as needed. With a solar trail camera, you’ll enjoy reliable, smart security that works all year, giving you peace of mind whether you’re home or away.
Ready to protect your property? Grab a solar trail camera, follow these easy steps, and enjoy worry-free security—powered by the sun! With the right setup, you can rest easy knowing your home is constantly under watch, no matter where life takes you.